Inking in Vista
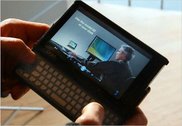
 I'm looking forward to using ink on the OQO. Its smaller form factor (almost the size of a 3x5 notepad) and its completely flush screen will mean I can hold it in one hand while inking. Here are some other reasons to consider upgrading to Vista if you're a pen user on a passive-digitizing system like the Samsung Q1:
- Personalized handwriting recognition.
- Adaptive handwriting learning.
- Floating Text Input Panel (TIP).
- TIP-aware input fields.
- Handwriting auto complete.
- Double-click word correction.
- Pen flicks.
- Grab-n-drag in Internet Explorer
- Dynamic visual feedback on pen actions.
- Touch Pointer -Finger as an input device.
Personalized Handwriting Recognition
The handwriting recognition in XP Tablet Edition is very good. The handwriting recognition in Vista is better. I find that it makes less mistakes and makes what appears to be more intelligent choices in its recognition based on what I'm writing. For example, it knows when I'm entering in a web address and looks for things like .com and .net. When I start writing a number, it knows to consider numbers as likely follow-on characters. It recognizes patterns in numbers as well, for example phone numbers. Vista includes control panel options for teaching it how you write. You can train Vista to learn that you put a slash through your zeros for example but never dot your I's.
Adaptive Handwriting Learning
Coupled with a better handwriting recognition engine, Vista employs an adaptive learning system. This means that it learns how you write, as you write. You don't need to train it. I am notorious for forgetting to cross my T's. At first, Vista misrecognized when I didn't cross my T's. Now, it has learned to expect it and generally correctly recognizes words even when I don't cross my T's. The end result is a natural interaction with the tablet, one where both the user and the device adapt to each other.
Floating Text Input Panel
By default, Vista now docks the TIP at the left edge of the screen. This is nice because the TIP is out of the way yet always available, even when an application is in full screen mode (like OneNote). The user simply clicks on the tab and the TIP flys out from the edge like a roll of paper. Click the close button and it flys back to its docked position. There is a nifty feature in Vista that allows you to selectively hide the TIP when you're not in pen mode (like when your UMPC is docked on your desk). Should you pick up the pen, the TIP magically appears, docked and ready. Pretty slick. I like this feature because it solves one of the problems with XP. In XP, you have to click the TIP icon in the task bar to explicitly open it. This means you have to exit full screen mode to open the TIP. When in pen mode, this explicit exiting of full screen mode, clicking the TIP icon in the task bar and resuming full screen mode bogs down the experience. Vista has elegantly solved this problem.
The floating TIP also means that it can expand as you're writing in it. In XP Tablet Edition, the TIP is always docked at the top or bottom of the screen. Once you fill up a line in the TIP, you have to insert it and then start a new line. In Vista, the TIP automatically grows, adding new lines as you approach the end of the current line. The TIP will add as many lines as will fit on the screen. This improves and streamlines the text inputting experience.
TIP-aware Input Fields
Click in any text input or text area control in Vista and a little TIP icon pops up next to the field. Clicking the icon automatically opens the TIP. In XP Tablet Edition, you have to either leave the TIP open at the top or bottom of the screen at all times, taking up precious screen real estate, or you have to explicitly click the TIP icon in the task bar and then put the cursor into the text input control. Eliminating both these requirements in Vista further streamlines the inking experience to the point where inking is natural and unobtrusive.
Handwriting Auto-complete
Probably one of the best features in Vista. Just like when you type into a field, as you begin writing in a field, Vista will pop up a menu with what it thinks you are trying to type, based on what you've typed before. You can either ignore the list or if what you're writing is already there, select it and be on your way. What a time saver and another example of how inking is integrated into the Vista experience.
Double-click Word Correction
Another important advancement in Vista. Anything that's been converted to typed text can be double clicked (or tapped) and Vista will pop up all the alternate words that it recognized for your handwriting. This allows you to keep on taking notes without worrying about correcting errors. When you get a chance, simply go to a misrecognized word and double click it. Generally, the word you intended is presented. Vista will now learn from its mistakes and try not to misrecognize that word later. Coolness.
Pen Flicks
Pen flicks are pen gestures that basically assign an action to a pen motion. For example, flick the pen in an upward motion on the screen and Vista will page the document down, almost like you're flicking the page itself up. Flick the pen left and you'll page back in the browser. Flick it right and your go forward. Pen flicks also allow you to do common tasks like copy, cut and paste using gestures. Pen flicks works not just in IE but any Windows application. They are another example of how Vista treats the pen as a true interface device. The basic thinking is, once you have the pen in hand, navigating and basic commands should be executable via the pen, much as they are via a mouse or keyboard.
Grab-n-Drag in Internet Explorer
IE 7 has a grab-n-drag mode that lets you use the pen to drag a page around. Imagine laying an open newspaper down flat on the kitchen table, then sliding it around under you with your hand. Grab-n-drag works the same way. It is very intuitive and is my preferred way or scrolling content around on a page. In combination with pen flicks, you can quickly page up or down to a part of a large document using flicks and then use grab-n-drag to fine tune your location within the content.
Dynamic Visual Feedback on Pen Actions
Unlike a mouse, a pen on a passive digitizing system like the Q1 does not have buttons. So, the operating system doesn't have an explicit way of knowing what a right click is. To solve this problem, Windows by default maps the right click to pressing and holding the pen down on the screen. There are several problems with this approach. First, no one can hold the pen completely still while doing this, so the OS has to give you some leeway for a jittery cursor as your pressing down. Jitter too much however and the OS will cancel the right click operation. Second, a certain amount of time has to pass after you press down (and while you're jittering a little bit) for the system to know that you're right clicking and not just pressing the pen down to draw or write. In XP Tablet Edition these two problems can bite you because it does not provide any feedback for how it is interpreting your actions. You simply press the pen down and if after a few seconds the context menu doesn't show up you assume it didn't work and you try again. Vista solves this problem by providing visual cues for things like right clicking. When you right click in Vista, an animated circle appears under your cursor. As you hold it there, the animated cursor draws itself out in a clock-wise motion. When the animation completes a full circle, the double click is recognized. As simple as it seems, this visual cue improves right click accuracy and provides feedback for a right-click failure. Very nice.
Touch Pointer -Finger as an Input Device
Vista also recognizes that our chubby little fingers are also input devices. While it is natural to point and gesture with the finger, it is difficult on small screens to accurately interact with on-screen controls like buttons and links. Vista has made a novel attempt at trying to solve this problem and as a UI designer I give them credit. The Touch Pointer mode in Vista (which is on by default) presents a mouse affordance proxy whenever you touch the screen. This touch pointer has two parts: a cross hair and a mouse affordance proxy that you use to drag the pointer around. So how you use it is: you point to the button on the screen. If you didn't hit it, the touch pointer appears and you simply drag the cross hairs over the button by dragging the mouse affordance proxy with you finger. Then you click the affordance proxy for the mouse button which is turn clicks the button under the cross hairs. It sounds complex but it is dead simple and quite useful.


No comments:
Post a Comment